
2026年11月12日

This article is a localized edition of the Japanese original. Read the Japanese original
Setting up an origin server in Imperva Cloud WAF takes five stages: add the site in the dashboard → register the origin server's IP (or host name) → prepare certificates → verify that it works, then point DNS to Imperva → restrict direct access to the origin to Imperva's IPs only. DNS is changed last because switching it midway would send visitors to an origin that is only half configured.
Here is the summary up front.
- Imperva Cloud WAF is a reverse proxy. Traffic flows visitor → Imperva's network → origin server, and you do not need to install software on the origin.
- When you add a site, Imperva shows a CNAME (for subdomains) and A records (for the apex domain) for that site.
- Do not change DNS until the origin settings and certificates are ready.
- After pointing DNS, use the origin server's firewall to reject ports 80/443 from anything other than Imperva's IP ranges. Without this, attackers can bypass the WAF and hit the origin directly.
- The source IP seen by the origin becomes Imperva's. Restore the real IP from the headers Imperva adds (
Incap-Client-IP,X-Forwarded-For). - As of November 2026, Imperva's product documentation has moved to the Thales Group site (docs-cybersec.thalesgroup.com).
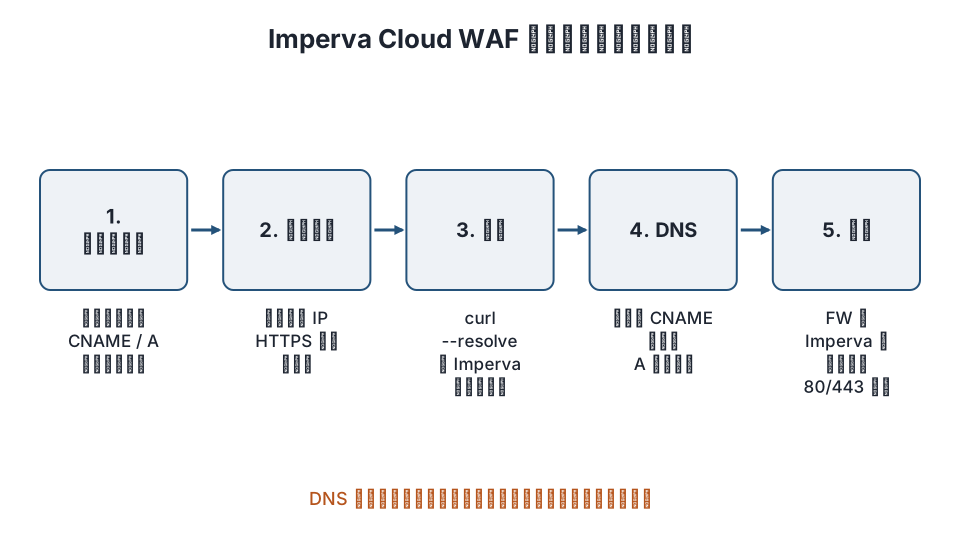
How Imperva Cloud WAF works
Imperva Cloud WAF is a service that routes visitors through Imperva's network by pointing your DNS to Imperva, applies WAF, DDoS protection and CDN (caching), and then forwards requests to the origin server. Its components are as follows.
| Component | Role |
|---|---|
| Website | The domain being protected. The unit you add in the dashboard |
| Origin server | The server actually running WordPress. Registered by IP or host name |
| CNAME / A records | DNS settings that send visitors to Imperva. Imperva provides the values |
| Certificates | A site certificate issued by Imperva, an account certificate, or a certificate you provide |
| Delivery rules | Actions on passing requests, such as rewriting headers or forwarding |
Like Cloudflare and Fastly, which this site also covers, it is a reverse proxy, and the configuration ideas are the same: point DNS, hide the origin, restore the real IP.
Step 1: Add the site
Add a site in the Imperva dashboard and register the domain to protect (example.com or www.example.com). Right after adding it, just note the CNAME and A record values Imperva shows; do not change DNS yet.
For HTTPS sites, SNI-only support is the default when adding. You can keep the default at this point, even if you are unsure whether you need to support old non-SNI clients.
Step 2: Configure the origin server
In the site settings, register the origin server's IP address (or host name) and the protocol and port Imperva uses to connect to the origin.
- Configure Imperva to connect to the origin over HTTPS (port 443). Imperva can also terminate HTTPS and send HTTP to the origin (SSL offloading), but the official explanation treats that as a setup where traffic between Imperva and the origin is not encrypted.
- If one origin serves several domains, there is a setting that lets sites using the same origin IP share a CNAME.
- Virtual hosts on the origin work on the assumption that the host name the visitor used (the
Hostheader) arrives unchanged. If the origin's host name differs from the public domain, use a delivery rule that rewrites theHostheader.
Step 3: Prepare certificates
There are three kinds of certificate for HTTPS between Imperva and visitors.
| Type | Characteristics |
|---|---|
| Site certificate issued by Imperva | For SNI-capable clients. Covers the domains registered for the site. Imperva issues and renews it automatically |
| Account certificate issued by Imperva | Also supports clients without SNI. Used in setups that share a CNAME |
| Your own certificate | Upload an existing certificate. For SNI-capable clients. If you share a CNAME, include all domains in the certificate |
Certificates issued by Imperva verify domain ownership through a CNAME and renew automatically. The validation CNAME record is used at every renewal, so do not delete it after issuance.
Keep the certificate on the origin server as it is. It is used when Imperva connects to the origin over HTTPS.
Step 4: Verify, then point DNS
Before changing DNS, test against the IP Imperva showed you while specifying the Host header.
# Check that the origin responds through Imperva (use the IP shown in the dashboard)
curl -sI --resolve example.com:443:<IP of the Imperva A record> https://example.com/ | head -n 10
If the response headers include Imperva's and the page content matches the origin, traffic is flowing. If there are no problems, change DNS.
- Subdomains such as
www.example.com: set the CNAME Imperva provided. example.com(the apex domain): a CNAME is not allowed there, so set the A records Imperva provided.
After the change, confirm that dig +short www.example.com returns Imperva's values, and check in a browser that you can reach the login screen.
Step 5: Restrict direct access to the origin
Even with DNS pointing to Imperva, anyone who knows the origin's IP can reach it directly. Imperva's official guidance also states clearly that the origin is not protected unless you restrict access to it by source IP. The list of IP ranges Imperva uses is available in the dashboard and through the API (my.imperva.com/api/integration/v1/ips), and ranges are sometimes added, so update it regularly.
Here is an example with Ubuntu's ufw. Replace the range with those from the list you retrieved.
# Check the current rules
sudo ufw status numbered
# Allow 80/443 only from Imperva ranges (repeat for each range)
sudo ufw allow from 192.0.2.0/24 to any port 80,443 proto tcp
# Deny 80/443 from everywhere else
sudo ufw deny 80/tcp
sudo ufw deny 443/tcp
You can also write allow / deny in the Nginx configuration, but blocking at the firewall keeps requests from ever reaching PHP. On shared hosting where IP restrictions are not possible, checking on the origin for a custom header Imperva adds can serve as a supplementary measure, but as explained in Imperva's community, a header alone cannot prevent direct access.
Step 6: Restore the real IP
Behind Imperva, every source the origin web server sees is an Imperva IP. Imperva forwards the visitor's IP in the Incap-Client-IP and X-Forwarded-For headers. Restore it in the web server.
Nginx:
# Trust Imperva IP ranges (replace with the ranges from the list)
set_real_ip_from 192.0.2.0/24;
real_ip_header Incap-Client-IP;
Apache (mod_remoteip):
RemoteIPHeader Incap-Client-IP
RemoteIPTrustedProxy 192.0.2.0/24
The important part is to list only Imperva's ranges in set_real_ip_from and RemoteIPTrustedProxy. If you trust the header without listing ranges, anyone connecting directly can claim any IP.
WordPress considerations
- Login screen: Until the real-IP restoration in Step 6 is done, WordPress login attempt limits and comment IP records treat everyone as an Imperva IP.
- Caching: When Imperva's CDN caches pages, logged-in views and freshly published changes can lag. Exclude the admin area (
/wp-admin/) and logged-in pages from caching, and avoid double caching with a caching plugin that keeps updates from showing. - HTTPS detection: If Imperva terminates HTTPS and sends HTTP to the origin, WordPress gets stuck in a redirect loop. Either connect to the origin over HTTPS as well, or have
wp-config.phpcheckX-Forwarded-Protoand setHTTPS(the details are the same as Step 2 of "A reverse proxy setup with Caddy in front of WordPress"). - Server migration: When the origin IP changes, update the origin settings in Imperva and add Imperva's IP ranges to the new server's firewall too. For planning a move, see "Cost, timeline and preparation when outsourcing a server migration".
FAQ
Should I register an IP or a host name for the Imperva origin?
If the IP is fixed, an IP is fine. For targets whose IP changes, such as a cloud load balancer, register a host name. When you register a host name, Imperva resolves that name to connect.
The site stopped loading after I pointed DNS
The usual causes are that the origin firewall does not allow Imperva's IP ranges, that the origin connection protocol or port does not match reality, or that the certificate is not active yet. Check the response through Imperva with the curl --resolve from Step 4, and see whether connections from Imperva reach the origin's access.log.
If I hide the origin IP, can attackers still bypass the WAF?
Past IPs can be found from DNS history, email headers and so on, so hiding is not enough. Rejecting everything except Imperva's IP ranges at the firewall is the core countermeasure. If possible, move the origin to a new IP before applying the restriction.
I cannot find Imperva’s documentation
As of November 2026, Imperva belongs to the Thales Group, and its product documentation has moved to docs-cybersec.thalesgroup.com and its community to community-cybersec.thalesgroup.com. The old URLs (docs.imperva.com) redirect there.
Summary
- Imperva Cloud WAF origin setup goes in the order add site → origin IP and certificates → verify → change DNS, with DNS changed last.
- After pointing DNS, reject ports 80/443 from anything other than Imperva's IP ranges at the origin firewall, and update the range list regularly.
- Restore the real IP from
Incap-Client-IPin the web server and trust only Imperva's ranges. In WordPress, check cache exclusions and HTTPS detection.
Related articles
- How to set up Cloudflare for WordPress
- How Fastly's WAF (Next-Gen WAF) works and how to set it up
- A reverse proxy setup with Caddy in front of WordPress
- Cost, timeline and preparation when outsourcing a server migration
References: Imperva Cloud Application Security documentation (Thales), Imperva Community – Cloud WAF Workshop: Website Onboarding and TLS Implementation (2025-10), nginx – ngx_http_realip_module, Apache – mod_remoteip
Revision history: 2026-11-09 full revision (replaced boilerplate with Imperva Cloud WAF origin setup steps, and added why DNS is changed last, origin IP protection, real IP restoration, and notes on WordPress caching and HTTPS detection). This article is run by WordPress Hakase (Lightscend Inc.).
Questions about WordPress? The publisher of this site is based in Japan and replies in Japanese. Contact (Japanese)